2020 Audi Q3 Static + Dynamic ADAS Calibration: 360 Camera & Radar Realignment
When the Vehicle Looks Fine, But It Isn’t: Static + Dynamic ADAS Calibration on the 2020 Audi Q3
7 Step ADAS: Because “No Warning Lights” Doesn’t Mean You’re Safe.

Introduction
Today, we’re working on a 2020 Audi Q3 that appears completely normal—no diagnostic trouble codes, no visible damage, and no recent part replacements. But appearances don’t guarantee precision. Using our 7 Step ADAS process, we discovered the radar and front 360 view camera were both out of alignment.
This session demonstrates how we tackled both a dynamic radar calibration and a static 360 camera calibration, even though there were no warning signs. These calibrations are essential to ensure accurate system performance and driver safety.
Setting Up for Calibration
Before recalibration begins, follow these prep steps to ensure clean data and a smooth session:
- Preparation:
- Verified that no diagnostic codes were present.
- Confirmed internet connection and launched the Otis scan tool.
- Selected guided functions to initiate radar recalibration.
- Verified calibration environment was clear of reflective surfaces or major obstructions.
- Starting the Calibration:
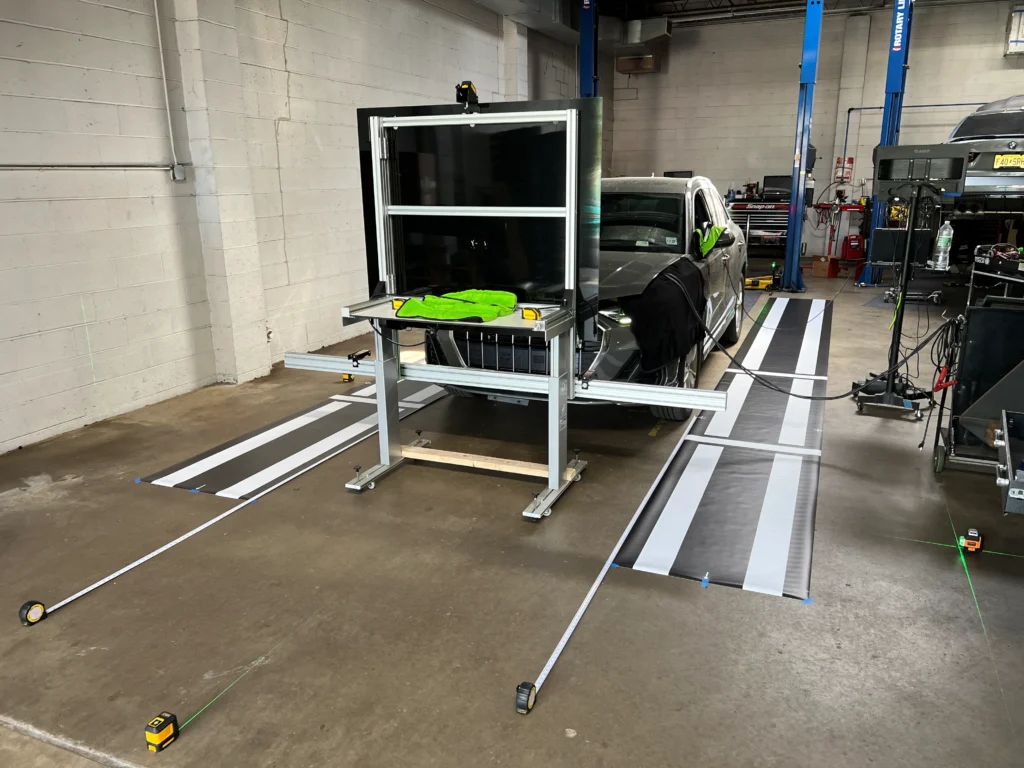
- Placed laser levels and built a calibration box using rulers and targets.
- Used visual centering and alignment to establish baseline for static calibration.
- Positioned the vehicle squarely within the grid for accurate camera reference.
- Dynamic Drive Calibration:
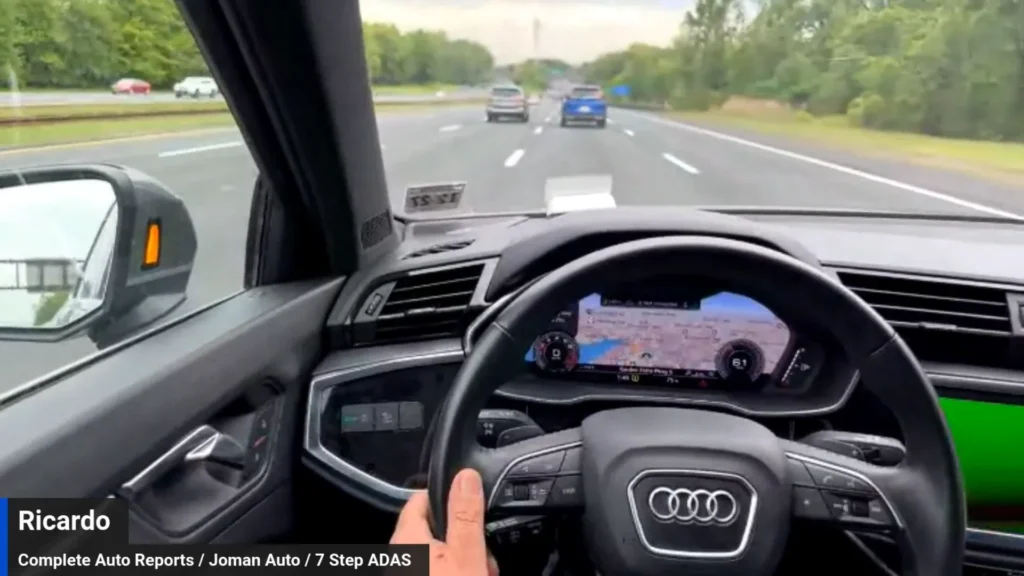
- Used Otis to initiate a dynamic calibration session.
- Followed guided instructions while driving at steady highway speed.
- Ensured lane discipline and uninterrupted driving path for optimal sensor response.


Finalizing the Calibration
Once the calibration is complete, Otis will display a green screen indicating success. Follow these steps to finalize the process:
- Radar Completion
- Verified that no diagnostic codes were present.
- Confirmed internet connection and launched the Otis scan tool.
- Selected guided functions to initiate radar recalibration.
- Verified calibration environment was clear of reflective surfaces or major obstructions.
- 360 Camera Confirmation
- Verified that the camera system stitching was complete and symmetrical.
- Rechecked laser references to confirm accuracy of the visual calibration.
- Ensured no distortion or misalignment in front view projections.
- Functionality Test
- Performed a short test drive to confirm adaptive cruise and lane features functioned as expected.
- Ensured smooth response to following distance changes and blind spot detection (where applicable).
Watch the Process in Action
Conclusion
This calibration proves that even when everything looks fine, it doesn’t mean it is. ADAS systems rely on millimeter-level precision, and the only way to know for sure is to test, measure, and recalibrate when needed.
Thanks for following along with another real-world 7 Step ADAS example. If you have questions, feel free to reach out—we’re here to help you turn complex calibrations into repeatable processes.
